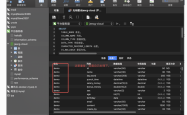
mysql 5.7.21 安装配置方法图文教程(window)
吾爱主题
阅读:187
2024-04-05 13:59:49
评论:0

window环境安装mysql5.7.21,具体内容如下
1. 从MySQL官网下载免安装的压缩包mysql-5.7.21-winx64.zip
2. 解压到相应的目录(此处解压到F:\mysql-5.7.21-winx64)
3. 配置环境变量,将MySQL的启动目录(F:\mysql-5.7.21-winx64\bin)添加到Path中
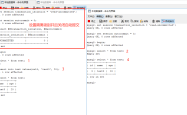
4. 在MySQL目录下(F:\mysql-5.7.21-winx64)创建my.ini文件,内容如下:
?| 1 2 3 4 5 6 7 8 9 10 11 12 13 14 15 16 | [mysql] # 设置mysql客户端默认字符集 default-character- set =utf8 [mysqld] #设置3306端口 port = 3306 # 设置mysql的安装目录 basedir=F:\mysql-5.7.21-winx64 # 设置mysql数据库的数据的存放目录 datadir=F:\mysql-5.7.21-winx64\data # 允许最大连接数 max_connections=200 # 服务端使用的字符集默认为8比特编码的latin1字符集 character- set -server=utf8 # 创建新表时将使用的默认存储引擎 default-storage-engine=INNODB |
5. 管理员身份运行cmd
切换目录:C:\Windows\system32>cd F:\mysql-5.7.21-winx64\bin
生成MySQL服务:
?| 1 2 | F:\mysql-5.7.21-winx64\bin>mysqld - install Service successfully installed. |
生成data目录:F:\mysql-5.7.21-winx64\bin>mysqld --initialize-insecure --user=mysql
启动MySQL服务:
?| 1 2 3 | C:\Windows\system32>net start mysql MySQL 服务正在启动 . MySQL 服务已经启动成功。 |
6. 登录数据库,修改密码(默认密码为空)
登录数据库:
?| 1 2 3 4 5 6 7 8 9 10 11 12 13 14 15 | C:\Windows\system32>mysql -uroot -p Enter password: Welcome to the MySQL monitor. Commands end with ; or \g. Your MySQL connection id is 2 Server version: 5.7.21 MySQL Community Server (GPL) Copyright (c) 2000, 2018, Oracle and /or its affiliates. All rights reserved. Oracle is a registered trademark of Oracle Corporation and /or its affiliates. Other names may be trademarks of their respective owners. Type 'help;' or '\h' for help. Type '\c' to clear the current input statement. mysql> |
修改密码:
?| 1 2 3 4 5 6 7 8 9 10 11 12 13 14 15 16 17 18 19 20 | mysql> mysql> mysql> show databases; +--------------------+ | Database | +--------------------+ | information_schema | | mysql | | performance_schema | | sys | +--------------------+ 4 rows in set (0.00 sec) mysql> use mysql; Database changed mysql> update user set authentication_string=password( "新密码" ) where User= "root" ; Query OK, 1 row affected, 1 warning (0.00 sec) Rows matched: 1 Changed: 1 Warnings: 1 mysql> mysql>FLUSH PRIVILEGES; |
以上就是本文的全部内容,希望对大家的学习有所帮助,也希望大家多多支持服务器之家。
原文链接:http://blog.csdn.net/chpllp/article/details/79097059
声明
1.本站遵循行业规范,任何转载的稿件都会明确标注作者和来源;2.本站的原创文章,请转载时务必注明文章作者和来源,不尊重原创的行为我们将追究责任;3.作者投稿可能会经我们编辑修改或补充。