linux 定时休眠的实现思路

最近公司规定晚上走人后必须关闭电脑,但是像我们这样的人,经常会忘记了关闭电脑,而且关闭电脑之后再恢复工作环境也是件挺麻烦的事情,无奈之下只能折腾一下,让linux定时休眠了。
休眠的类型
目前大概由三种类型的休眠:
suspend(suspend to RAM)
指的是除了内存以外的大部分机器部件都进入断电状态。 这种休眠状态恢复速度特别快,但由于内存中的数据并没有被保存下来,因此这个状态的系统并没有进入真正意义上的休眠状态,还在持续耗电。
hibernate(suspend to disk)
这种休眠会将内存中的系统状态写入交换空间内,当系统启动时就可以从交换空间内读回系统状态。 这种情况下系统可以完全断电,但由于要保存/读取系统状态到/从交换空间,因此速度会比较慢,而且需要进行一些配置(下面会说到)
hybrid(suspend to both)
结合了上面两种休眠类型。它像hibernate一样将系统状态存入交换空间内,同时也像suspend一样并不关闭电源。 这种,在电源未耗尽之前,它能很快的从休眠状态恢复。而若休眠期间电源耗尽,则它可以从交换空间中恢复系统状态。
suspend 休眠
进入 suspend 特别简单,无需额外的配置,在 systemd 系统上直接执行 systemctl suspend 就行了。\
systemctl suspend
它的实际动作由 systemd-suspend.service 所定义, 在 archlinux 上,它长成这样子的:
?| 1 2 3 4 5 6 7 8 9 10 11 12 13 14 15 16 | # SPDX-License-Identifier: LGPL-2.1+ ## This file is part of systemd. # # systemd is free software; you can redistribute it and/or modify it # under the terms of the GNU Lesser General Public License as published by # the Free Software Foundation; either version 2.1 of the License, or # (at your option) any later version. [Unit] Description=Suspend Documentation= man :systemd-suspend.service(8) DefaultDependencies=no Requires= sleep .target After= sleep .target [Service] Type=oneshot ExecStart= /usr/lib/systemd/systemd-sleep suspend |
Hibernation 休眠
由于 hibernation 休眠要求将内存中的内容写入到交换空间中,因此你至少要有一个空间大于内存的交换分区或者交换文件。 (其实若交换空间不够内存大也不是一定就无法进行hibernation休眠,可以尝试运行 echo 0 |sudo tee /sys/power/image_size, 这会让系统在写入交换空间时尽可能的进行压缩,但这种方法也无法保证一定能够休眠成功)
若之前没有创建交换分区,那么可以临时创建一个交换文件来用。比如下面命令创建一个5G的交换文件
?| 1 2 3 4 5 6 7 8 9 | sudo dd if = /dev/zero of= /swapfile bs=10240 count=524288 sudo mkswap /swapfile sudo chmod 0600 /swapfile sudo swapon /swapfile sudo cp /etc/fstab /etc/fstab .bak echo "/swapfile swap swap default 0 0" | tee -a /etc/fstab Setting up swapspace version 1, size = 5 GiB (5368705024 bytes) no label, UUID=d0f0c682-e1fa-416f-8fe2-b554b8ca363a /swapfile swap swap default 0 0 |
除此创建交换分区之外,我们还需要修改kernel的启动参数,让系统在启动时先尝试从交换空间中恢复状态。 具体操作如下:
1. 如果使用交换分区来保存,则只需要为添加kernel的启动参数 resume=交换分区 即可
(1) 查看那块分区是交换分区
swapon
?| 1 2 3 | NAME TYPE SIZE USED PRIO /dev/sda2 partition 8G 280K -2 /swapfile file 5G 0B -3 |
可以看出交换分区为 /dev/sda2
(2) 修改 /etc/default/grub, 为 GRUB_CMDLINE_LINUX_DEFAULT 行添加参数 resume=/dev/sda2
?| 1 | sudo sed -i '/GRUB_CMDLINE_LINUX_DEFAULT/ s!"$! resume=/dev/sda2"!' /etc/default/grub |
2. 如果是使用交换文件,则需要添加两个参数 resume=交换文件所在磁盘 以及 resume_offset=交换文件在磁盘中的偏移位置:
(1) 查看交换文件所在磁盘
df /swapfile
文件系统 1K-块 已用 可用 已用% 挂载点
/dev/sda3 55253696 27582224 24834972 53% /
说明磁盘为 /dev/sda3
(2) 查看交换文件的偏移位置
?| 1 2 3 4 5 6 | sudo filefrag - v /swapfile | head -5 Filesystem type is: ef53 File size of /swapfile is 5368709120 (1310720 blocks of 4096 bytes) ext: logical_offset: physical_offset: length: expected: flags: 0: 0.. 32767: 4653056.. 4685823: 32768: 1: 32768.. 65535: 4685824.. 4718591: 32768: |
这里可以看出物理偏移位置时4653056
(3) 修改 /etc/default/grub, 为 GRUB_CMDLINE_LINUX_DEFAULT 行添加参数 resume=/dev/sda3 resume_offset=4653056
?| 1 | sudo sed -i '/GRUB_CMDLINE_LINUX_DEFAULT/ s!"$! resume=/dev/sda3 resume_offset=4653056"!' /etc/default/grub |
3. 重新生成 grub.cfg 文件
sudo grub-mkconfig -o /boot/grub/grub.cfg
(1) 配置initramfs添加 resume hook 修改 /etc/mkinitcpio.conf 文件,在 HOOKS 中添加 resume
?| 1 | sudo sed -i '/^HOOKS=/ s/)/ resume)/' /etc/mkinitcpio .conf |
其中由两点需要注意:
- 由于分区的label和UUID都是 udev 分配的,因此 resume 必须放在 udev 之后
- 由于 systemd hook 已经有了 resume 的功能,因此若已经有了 systemd hook,则无需再添加 udev hook
(2) 重新生成initramfs
?| 1 2 3 4 5 6 7 8 9 10 11 12 13 14 | sudo mkinitcpio -g /boot/initramfs-linux-lily .img ==> Starting build: 4.16.12-2-lily -> Running build hook: [base] -> Running build hook: [udev] -> Running build hook: [autodetect] -> Running build hook: [modconf] -> Running build hook: [block] -> Running build hook: [filesystems] -> Running build hook: [keyboard] -> Running build hook: [ fsck ] -> Running build hook: [resume] ==> Generating module dependencies ==> Creating gzip -compressed initcpio image: /boot/initramfs-linux-lily .img ==> Image generation successful |
(3) 重启,让配置生效
经过上面复杂的配置后,hibernation 休眠才能真正成功。与 suspend 休眠类似,我们也能使用 systemctl 来进行休眠
systemctl hibernate
类似的,它的实际动作由 systemd-hibernte.service 所定义, 在 archlinux 上,它长成这样子的:
?| 1 2 3 4 5 6 7 8 9 10 11 12 13 14 15 16 17 | # SPDX-License-Identifier: LGPL-2.1+ # # This file is part of systemd. # # systemd is free software; you can redistribute it and/or modify it # under the terms of the GNU Lesser General Public License as published by # the Free Software Foundation; either version 2.1 of the License, or # (at your option) any later version. [Unit] Description=Hibernate Documentation= man :systemd-suspend.service(8) DefaultDependencies=no Requires= sleep .target After= sleep .target [Service] Type=oneshot ExecStart= /usr/lib/systemd/systemd-sleep hibernate |
hybrid 休眠
在配置好 hibernate 休眠后,也就能正常进行 hybrid 休眠了,方法是执行
systemctl hybrid-sleep
类似的,它的实际动作由 systemd-hybrid-sleep.service 所定义, 在 archlinux 上,它长成这样子的:
?| 1 2 3 4 5 6 7 8 9 10 11 12 13 14 15 16 17 | # SPDX-License-Identifier: LGPL-2.1+ # # This file is part of systemd. # # systemd is free software; you can redistribute it and/or modify it # under the terms of the GNU Lesser General Public License as published by # the Free Software Foundation; either version 2.1 of the License, or # (at your option) any later version. [Unit] Description=Hybrid Suspend+Hibernate Documentation= man :systemd-suspend.service(8) DefaultDependencies=no Requires= sleep .target After= sleep .target [Service] Type=oneshot ExecStart= /usr/lib/systemd/systemd-sleep hybrid- sleep |
Sleep Hooks
从上面的service文件中可以看出,不管是哪种类型的系统休眠,其内部实际调用的都是 systemd-sleep.
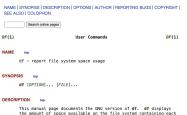
man systemd-sleep
?| 1 2 3 4 5 6 7 8 9 10 11 12 13 14 15 16 17 18 19 20 21 22 23 24 25 26 27 28 29 30 31 32 33 34 35 36 37 38 39 40 41 42 43 44 45 46 47 48 49 50 51 | SYSTEMD-SUSPEND.SERVICE(8) systemd-suspend.service SYSTEMD-SUSPEND.SERVICE(8) NAME systemd-suspend.service, systemd-hibernate.service, systemd-hybrid- sleep .service, systemd- sleep - System sleep state logic SYNOPSIS systemd-suspend.service systemd-hibernate.service systemd-hybrid- sleep .service /usr/lib/systemd/system-sleep DESCRIPTION systemd-suspend.service is a system service that is pulled in by suspend.target and is responsible for the actual system suspend. Similarly, systemd-hibernate.service is pulled in by hibernate.target to execute the actual hibernation. Finally, systemd-hybrid- sleep .service is pulled in by hybrid- sleep .target to execute hybrid hibernation with system suspend. Immediately before entering system suspend and /or hibernation systemd-suspend.service (and the other mentioned units , respectively) will run all executables in /usr/lib/systemd/system-sleep/ and pass two arguments to them. The first argument will be "pre" , the second either "suspend" , "hibernate" , or "hybrid-sleep" depending on the chosen action. Immediately after leaving system suspend and /or hibernation the same executables are run, but the first argument is now "post" . All executables in this directory are executed in parallel, and execution of the action is not continued until all executables have finished. Note that scripts or binaries dropped in /usr/lib/systemd/system-sleep/ are intended for local use only and should be considered hacks. If applications want to react to system suspend /hibernation and resume, they should rather use the Inhibitor interface[1]. Note that systemd-suspend.service, systemd-hibernate.service, and systemd-hybrid- sleep .service should never be executed directly. Instead, trigger system sleep states with a command such as "systemctl suspend" or similar. Internally, this service will echo a string like "mem" into /sys/power/state , to trigger the actual system suspend. What exactly is written where can be configured in the "[Sleep]" section of /etc/systemd/sleep .conf or a sleep .conf.d file . See systemd- sleep .conf(5). OPTIONS systemd- sleep understands the following commands: -h, --help Print a short help text and exit . --version Print a short version string and exit . suspend, hibernate, hybrid- sleep Suspend, hibernate, or put the system to hybrid sleep . SEE ALSO systemd- sleep .conf(5), systemd(1), systemctl(1), systemd.special(7), systemd-halt.service(8) NOTES 1. Inhibitor interface |
https://www.freedesktop.org/wiki/Software/systemd/inhibit
systemd 238 SYSTEMD-SUSPEND.SERVICE(8)
根据 systemd-sleep 的manual pages,可以看到在系统休眠之前以及从休眠状态恢复之后,都会并行地调用 /usr/lib/systemd/system-sleep 中的脚本,并传递两个参数。
第一个参数用来指定是开始休眠还是从休眠状态恢复,分别对应的字符串 “pre” 与 “post”.
第二个参数用来指明休眠的类型,分别为字符串 “suspend”, “hibernate” 以及 “hybrid-sleep”
定时执行休眠
systemd 系统中的定时任务是由timer来实现的,而每个timer都与一个service相对应。
一般情况下,timer的名称与service一致,但必要时可以通过在.timer文件中的 [Timer] 部分指定 Unit= 选项来控制一个与timer不同名的service。
下面是一个timer的例子,每天21:30分开始自动hibernate休眠
?| 1 2 3 4 5 6 7 8 | [Unit] Description=Hibernate every 21:30:00 [Timer] OnCalendar=*-*-* 21:30:00 Persistent= true Unit=systemd-hibernate.service [Install] WantedBy=timers.target |
定时唤醒休眠的linux
使用 rtcwake 可以在给定的时间唤醒处于休眠状态的电脑
其主要用法为:
?| 1 2 3 | sudo rtcwake -m ${mode} -t ${time_t} # 或者 sudo rtcwake -m ${mode} -s ${seconds} |
其中,参数mode为待机模式,有以下几个选项:
standby
普通待机模式,为默认选项,对应 ACPI state S1
mem
suspend休眠,对应 ACPI state S3
disk
hibernation 休眠,对应 ACPI state S4
off
通过调用系统的关机命令来休眠,对应 ACPI state S5
参数 time_t 为从 1970-01-01, 00:00 UTC 开始到现在的秒数,可以通过 date 命令来将时间字符串转换成这个秒数,比如
sudo rtcwake -m disk -t $(date -d 08:30 +%s)
就是进行 hibernation 休眠,并于08:30分唤醒
参数 seconds 为秒数,表示从现在开始的多少秒后,系统唤醒。
总结
以上所述是小编给大家介绍的linux 定时休眠的实现思路,希望对大家有所帮助,如果大家有任何疑问请给我留言,小编会及时回复大家的。在此也非常感谢大家对服务器之家网站的支持!
原文链接:http://www.importnew.com/29158.html
1.本站遵循行业规范,任何转载的稿件都会明确标注作者和来源;2.本站的原创文章,请转载时务必注明文章作者和来源,不尊重原创的行为我们将追究责任;3.作者投稿可能会经我们编辑修改或补充。